Philips Hue bridge
Recently I bought a Hue bridge with two bulbs, it was a specific “cheap” pack around 50€, the bridge itself usually costs that price, so I was quite interested. My idea was just to play with those bulbs and do funny things such as blinking when I get new mail, etc … After messing with it for a while using the Philips HUE app on Android, I wanted to do more so I checked the API. It’s quite well made and allows you to do a lot on your own, though, I had in mind to hide my bridge in my own local network, for security purpose and also to add more functionalities to it, let’s see how to make a hue bridge reverse proxy !
Requirements
To do that, you need:
- a router, your own home box is enough
- a raspberry PI or any computer with Apache and PHP
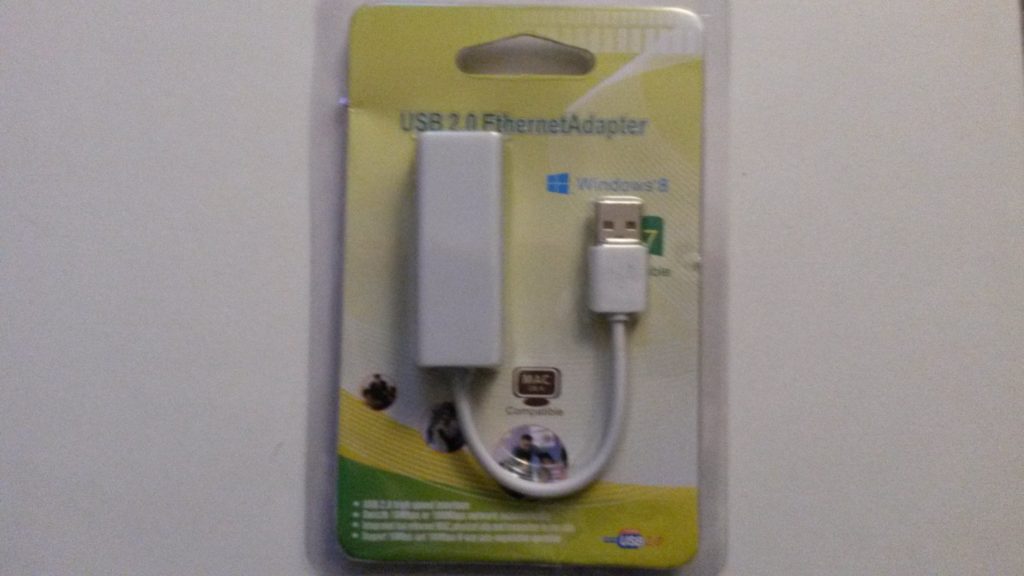
- (optional) a USB to ethernet adapter, I bought this cheap one
- some time to configure it all !
Configure the bridge
Follow the official instructions to install your bridge, you have to connect it to your router, it needs an IP within your local network so we can reach it with an other computer.
Once it’s all set and that it got an IP, open up your web browser and go to the following URL: http://192.168.1.xxx/debug/clip.html, obviously set the IP address to the correct one.
Create a new user following the steps on the API documentation. Keep the generated hash around, it’s important to control your bridge.
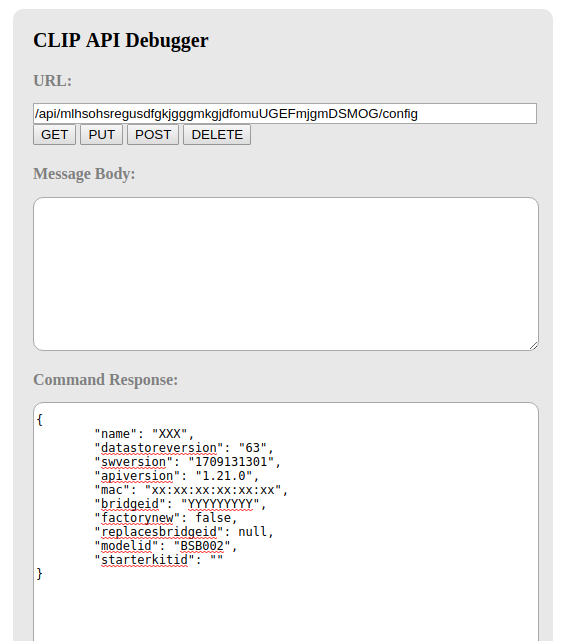
Stay in your web browser in the debug and do a GET call to http://<ip-address.of.the.bridge>/api/<username>/config, it will look like that:

Get the bridge information
Copy the mac field and save it somewhere, it’s important.
Finally, we will configure the bridge to stop DHCP and also to take the IP we want it to get out of the local range.
Still in your browser, do a PUT request to http://<ip-address.of.the.bridge>/api/<username>/config with the following content:
{"ipaddress":"10.50.0.2", "dhcp":false, "netmask": "255.255.255.0", "gateway": "10.50.0.1" }
Do a PUT request to http://<ip-address.of.the.bridge>/api/<username>/config
Once you run it, you should lose the control to the bridge ! No worries, we’ll get it back.
Network adapter
If you bought the network adapter I suggested, it should look like that:

Network adapter in its blister
SSH to your raspberry pi, and check the network configuration:
 # ifconfig -a
 eth0      Link encap:Ethernet  HWaddr XX:XX:XX:XX:XX:XX
           inet adr:192.168.1.3  Bcast:192.168.1.255  Masque:255.255.255.0
           UP BROADCAST RUNNING MULTICAST  MTU:1500  Metric:1
           RX packets:1575384 errors:0 dropped:62 overruns:0 frame:0
           TX packets:810579 errors:0 dropped:0 overruns:0 carrier:0
           collisions:0 lg file transmission:1000
           RX bytes:271762165 (259.1 MiB)  TX bytes:189260556 (180.4 MiB)

 lo        Link encap:Boucle locale
           inet adr:127.0.0.1  Masque:255.0.0.0
           UP LOOPBACK RUNNING  MTU:65536  Metric:1
           RX packets:4781492 errors:0 dropped:0 overruns:0 frame:0
           TX packets:4781492 errors:0 dropped:0 overruns:0 carrier:0
           collisions:0 lg file transmission:1
           RX bytes:402951806 (384.2 MiB)  TX bytes:402951806 (384.2 MiB)
ifconfig -a before plugging the adapter
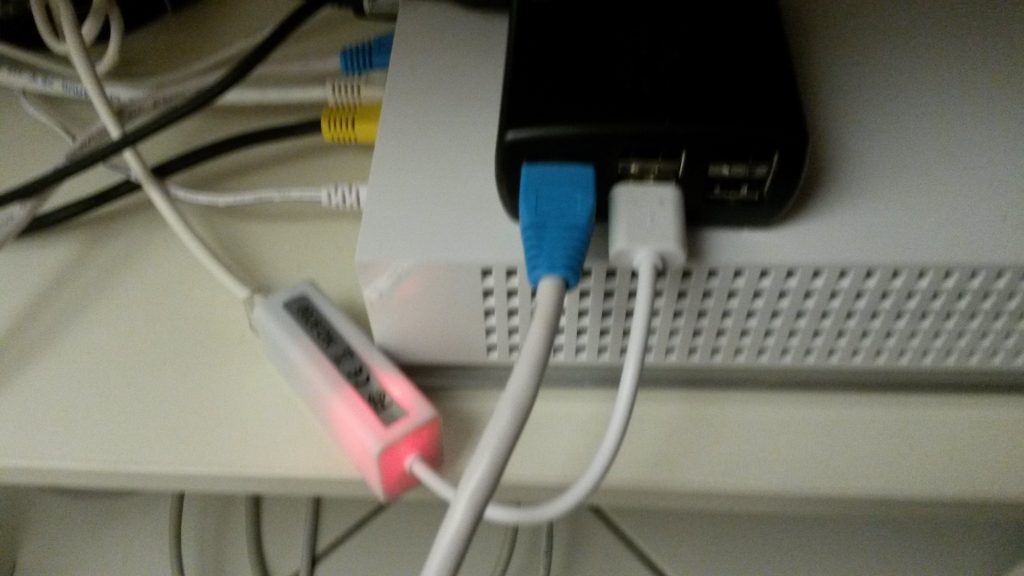
Now plug the network adapter USB side to your PI, and connect the ethernet cable to the ethernet adapter.

Network adapter plugged
We’ll check the adapter is working by doing the same command, but now we should see eth1 !
 # ifconfig -a
 eth0      Link encap:Ethernet  HWaddr XX:XX:XX:XX:XX:XX
           inet adr:192.168.1.3  Bcast:192.168.1.255  Masque:255.255.255.0
           UP BROADCAST RUNNING MULTICAST  MTU:1500  Metric:1
           RX packets:1576244 errors:0 dropped:62 overruns:0 frame:0
           TX packets:811252 errors:0 dropped:0 overruns:0 carrier:0
           collisions:0 lg file transmission:1000
           RX bytes:271834756 (259.2 MiB)  TX bytes:189382050 (180.6 MiB)

 lo        Link encap:Boucle locale
           inet adr:127.0.0.1  Masque:255.0.0.0
           UP LOOPBACK RUNNING  MTU:65536  Metric:1
           RX packets:4781492 errors:0 dropped:0 overruns:0 frame:0
           TX packets:4781492 errors:0 dropped:0 overruns:0 carrier:0
           collisions:0 lg file transmission:1
           RX bytes:402951806 (384.2 MiB)  TX bytes:402951806 (384.2 MiB)

 eth1      Link encap:Ethernet  HWaddr XX:XX:XX:XX:XX:XX
           BROADCAST MULTICAST  MTU:1500  Metric:1
           RX packets:0 errors:0 dropped:0 overruns:0 frame:0
           TX packets:0 errors:0 dropped:0 overruns:0 carrier:0
           collisions:0 lg file transmission:1000
           RX bytes:0 (0.0 B)  TX bytes:0 (0.0 B)
ifconfig -a after plugging the adapter
Perfect, now let’s configure the network, edit the file /etc/network/interfaces by adding the following:
 auto eth1
 iface eth1 inet static
         address 10.50.0.1
         netmask 24
/etc/network/interfaces
Bring up eth1 end ping your bridge:
#  ifup eth1
 # ping 10.50.0.2
 PING 10.50.0.2 (10.50.0.2) 56(84) bytes of data.
 64 bytes from 10.50.0.2: icmp_seq=1 ttl=64 time=1.86 ms
 64 bytes from 10.50.0.2: icmp_seq=2 ttl=64 time=1.45 ms
 ^C
 --- 10.50.0.2 ping statistics ---
 2 packets transmitted, 2 received, 0% packet loss, time 1001ms
 rtt min/avg/max/mdev = 1.454/1.661/1.868/0.207 ms
Bring up eth1 and ping your bridge !
If it all works, you can move on to the HTTPS part, else, try using some networking tools such as tcpdump to determine what goes wrong.
HTTPS
New release of the Hue bridge uses HTTPS, of course it can’t rely on a real domain name since it’s connecting on the IP of the bridge and it can be different, after doing some reverse engineering it I found out how it works. Actually every bridge as an ID. Now that the link between your PI and the bridge is UP you can get your ID easily and prepare to create your own HTTPS certificate.
# openssl s_client -showcerts -connect 10.50.0.2:443 </dev/null
...
---
Server certificate
subject=/C=NL/O=Philips Hue/CN=00xxxxxxxx
issuer=/C=NL/O=Philips Hue/CN=00xxxxxxxx
---
...
Check what's the CN of your bridge
So there you go you have your CN which is actually what’s necessary to create your own HTTPS certificate. If you want to change your ID, you can, you’ll have to change it also in the PHP below.
First create a directory to store your key, certificate.
# mkdir -p /etc/ssl/hue
Create the /etc/ssl/hue directory
Now the key and the certificate
# openssl req -newkey rsa:4096 -nodes -keyout key_hue.pem -x509 -days 3650 -out certificate_hue.pem
Create your self signed certificate
The only parameter that matters here is the CN, put a correct bridge ID, in my case I just changed a few values.
Finally just concat both files to create a pem.
# cat certificate_hue.pem key_hue.pem > pem_hue.pem
Create the full certificate
A word of advice, as of now (version 1806051111 of the bridge), the hue app will use HTTPS to connect to the bridge, the first time you validate the connection it will stick the certificate. If you ever change the certificate, you’ll have to remove the credentials in your Android/iOS (i.e clear all data of the app) and press on the button again.
Second word of advice, if you test a lot, be careful to keep clean your whitelist user, it gets messy very fast ! You can delete some doing a DELETE request on /api/userYouControl/config/whitelist/userYouWishTodelete
Reverse proxy
Do you remember the MAC address of your bridge ? If, as I previously said you did, then we will use it pretty soon.
Stay on your PI and open up again /etc/network/interfaces, we will change the mac address of eth0 so if it will be seen as a HUE bridge for the mobile apps. You can use the mac address of the real bridge and alter it so it’s different, I suggest you use this website to make it sure it’s still seen as “Philips Lighting BV“.
auto eth0
iface eth0 inet static
        address 192.168.1.2
        netmask 24
        gateway 192.168.1.254
        dns-nameservers 127.0.0.1
        # faking MAC address to Philips HUE style
        hwaddress ether 00:17:88:78:45:12
Change the mac address
Now on your home box, set the IP of your PI as a static one for this tutorial it will be 192.168.1.3.
It’s time to install haproxy, apache and php, I won’t describe this here, do as you wish, we’ll just go through what’s really important.
There goes a valid haproxy configuration:
# Faking Hue Bridge requires HTTPS now

frontend f_http_hue
        mode http
        bind 192.168.1.3:80
        use_backend b_http_hue

frontend f_https_hue
        mode http
        bind 192.168.1.3:443 ssl crt /etc/ssl/hue/pem_hue.pem
        use_backend b_http_hue

backend b_http_hue
        mode http
        server bridge 127.0.0.1:8080
/etc/haproxy/haproxy.cfg
Install mod_proxy and mod_http_proxy, create a new virtualhost /etc/apache2/sites-available/hue.conf this way:
<VirtualHost 127.0.0.1:8080>
    DocumentRoot /var/www
    ServerName xxxxxxx
    CustomLog /var/log/apache2/hue_access.log combined env=!forwarded
    CustomLog /var/log/apache2/hue_access.log proxy env=forwarded
    ErrorLog /var/log/apache2/hue_error.log

    RewriteEngine On
    RewriteCond %{REQUEST_URI}  ^$ [OR]
    RewriteCond %{REQUEST_URI}  ^/$ [OR]
    RewriteCond %{REQUEST_URI}  \.png$ [OR]
    RewriteCond %{REQUEST_URI}  \.xml$ [OR]
    RewriteCond %{REQUEST_URI}  ^/debug/clip.html
    RewriteRule (.*)              http://10.50.0.2$1    [P,L]

    RewriteRule ^(/api.*)$ /index.php?q=$1 [L,QSA]
</VirtualHost>
/etc/apache2/sites-available/hue.conf
Activate it and edit /var/www/index.php:
<?php
/*
* Activate proxy_module and proxy_http_module
*/

ignore_user_abort(true);

$mac_address = [ '<mac address of the real bridge>',  '<your fake Philips HUE mac address>' ];
$ip_hue = [ '<ip of the real bridge>', '<ip of your PI>' ];
$bridge_id = [ '<the real bridge id>', '<faked id bridge>' ];
$gateway_hue = [ '<ip of your PI>', '<gateway of your local network>' ];
$url = 'http://10.50.0.2'.$_SERVER['REQUEST_URI'];
$useDB = false;

$options =[
    'http' => [
        'header'  => "Accept-Encoding: gzip, deflate\r\nAccept-language: en-US,en;q=0.8\r\nUser-Agent: ".$_SERVER["HTTP_USER_AGENT"]."\r\n",
        'method'  => $_SERVER["REQUEST_METHOD"],
    ]
];

if($_SERVER["REQUEST_METHOD"] !== 'GET' ){
    $options['http']['header'] .= "Content-type: application/x-www-form-urlencoded\r\n";
    $options['http']['content'] = file_get_contents("php://input");
}

$context  = stream_context_create($options);
$result = file_get_contents($url, false, $context);
if ($result === FALSE) {  }

// faking HUE bridge EDIT: 13/08, it needs to be faked all the time now
$result = str_replace($mac_address[0], $mac_address[1], $result);
$result = str_replace($ip_hue[0], $ip_hue[1], $result);
$result = str_replace($gateway_hue[0], $gateway_hue[1], $result);
$result = str_replace($bridge_id[0], $bridge_id[1], $result);

ob_start();
echo $result;
$size = ob_get_length();
header("Content-Length: {$size}");
header("Connection: close");
ob_end_flush();
ob_flush();
flush();

/** DB part **/
if($useDB){

    $_user = '';
    $_password = '';
    $_database = '';
    $_host = '';

    try {
	$_db_link = new PDO('mysql:host='.$_host.';dbname='.$_database.';charset=utf8', $_user, $_password);
    } catch (Exception $e) {
        die('Erreur : ' . $e->getMessage());
    }

    $stmt = $_db_link->prepare("INSERT INTO hue_log (ip, method, url, content) VALUES (:ip, :method, :url, :content)");
    $stmt->bindParam(':ip', hash('sha256', $_SERVER['REMOTE_ADDR']));
    $stmt->bindParam(':method', $_SERVER['REQUEST_METHOD']);
    $stmt->bindParam(':url', $_SERVER['REQUEST_URI']);
    $stmt->bindParam(':content', $result);
    $stmt->execute();
}
Now restart Apache and open your browser on http://192.168.1.3, it should load ! Check the logs of Apache, you should also see some requests.
Philips’ upgrades
I didn’t mention it, because I hadn’t figure it yet, but all the Philips’ Upgrades won’t be done anymore since the bridge has no internet access. I found out one way to do it, it’s tricky but anyone can do it.
I use the Hue App on my mobile to control lights, it tells you when some upgrades are required, it’s how I know I should run them. When it happens, I simply forward packets from my bridge to my PI and force the update thought the API, let’s do it.
Allow packet forwarding and forward the bridge to the PI:
 echo 1 > /proc/sys/net/ipv4/ip_forward
 iptables -t nat -A POSTROUTING -o eth0 -j MASQUERADE
 iptables -A FORWARD -i eth0 -o eth1 -m state --state RELATED,ESTABLISHED -j ACCEPT
 iptables -A FORWARD -i eth1 -o eth0 -j ACCEPT
Allow kernel forwarding and forward bridge to the PI
You should notice that the third light is now lit, it reaches internet, no worries we open it up only temporarily.
Connect to the API and run the following commands:
 {
         "portalservices": true
 }
Do a PUT request to http://<ip-address.of.the.bridge>/api/<username>/config
{"swupdate": {"checkforupdate":true}}
Do a PUT request to http://<ip-address.of.the.bridge>/api/<username>/config
 {
         "swupdate": {
                     "updatestate": 3
                         }
 }
Do a PUT request to http://<ip-address.of.the.bridge>/api/<username>/config
It should download the update, restart your bridge, launch the update from your mobile app, sometimes it’s quite long ! To update three bulbs it took me around 1 hour, it depends on the update.
Once everything is done, cut the bridge from the internet:
 iptables -F nat
 iptables -F FORWARD
 echo 0 > /proc/sys/net/ipv4/ip_forward
Clean up the firewall and shut down forwarding
Reboot it once again so remaining connections will be stopped. Only two lights should remain.
You might check that your bridge is really off the internet by doing a GET request to http://<ip-address.of.the.bridge>/api/<username>/config, you should have that:
     "portalstate": {
         "signedon": false,
         "incoming": false,
         "outgoing": false,
         "communication": "disconnected"
     },
     "internetservices": {
         "internet": "disconnected",
         "remoteaccess": "disconnected",
         "time": "disconnected",
         "swupdate": "disconnected"
     },
Content of the GET to http://<ip-address.of.the.bridge>/api/<username>/config
Also, it’s possible you do a tcpdump to check to what your bridge tries to contact, it might amuse you.
Sources for the upgrades:
Epilogue
Your HUE bridge is hidden behind your raspberry PI, it’s secure moreover you can also edit the PHP to add new functionality !


